OPay Flutter SDK
All payment solutions offered by OPay readily available in your clients' hands.
Prerequisites
OPay SDK will allow your Flutter application to:
- Launch full-screen activities to collect payment details, shipping address, and shipping method.
- Accept card, reference code, installment payment readily available from OPay.
Make sure you have an active OPay merchant account, or create account.
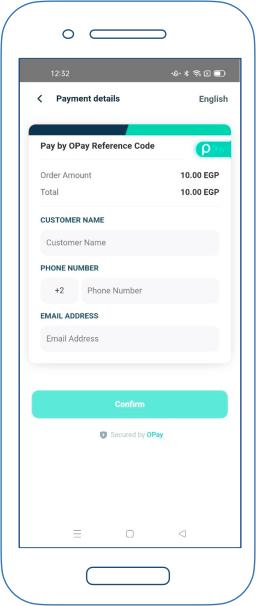
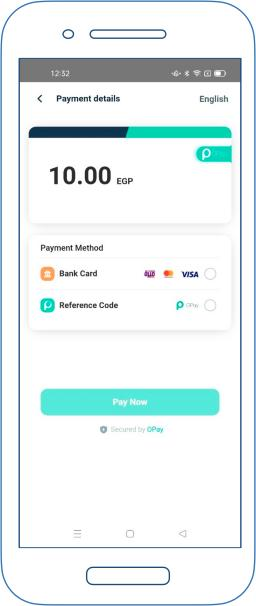
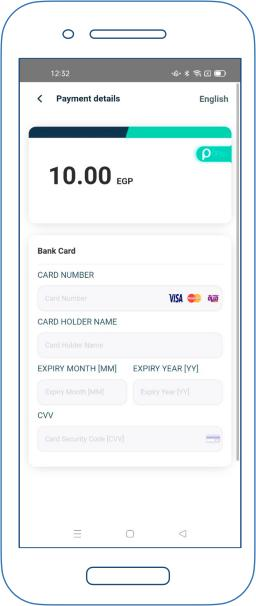
How Flutter SDK Plugin Looks Like


How it works

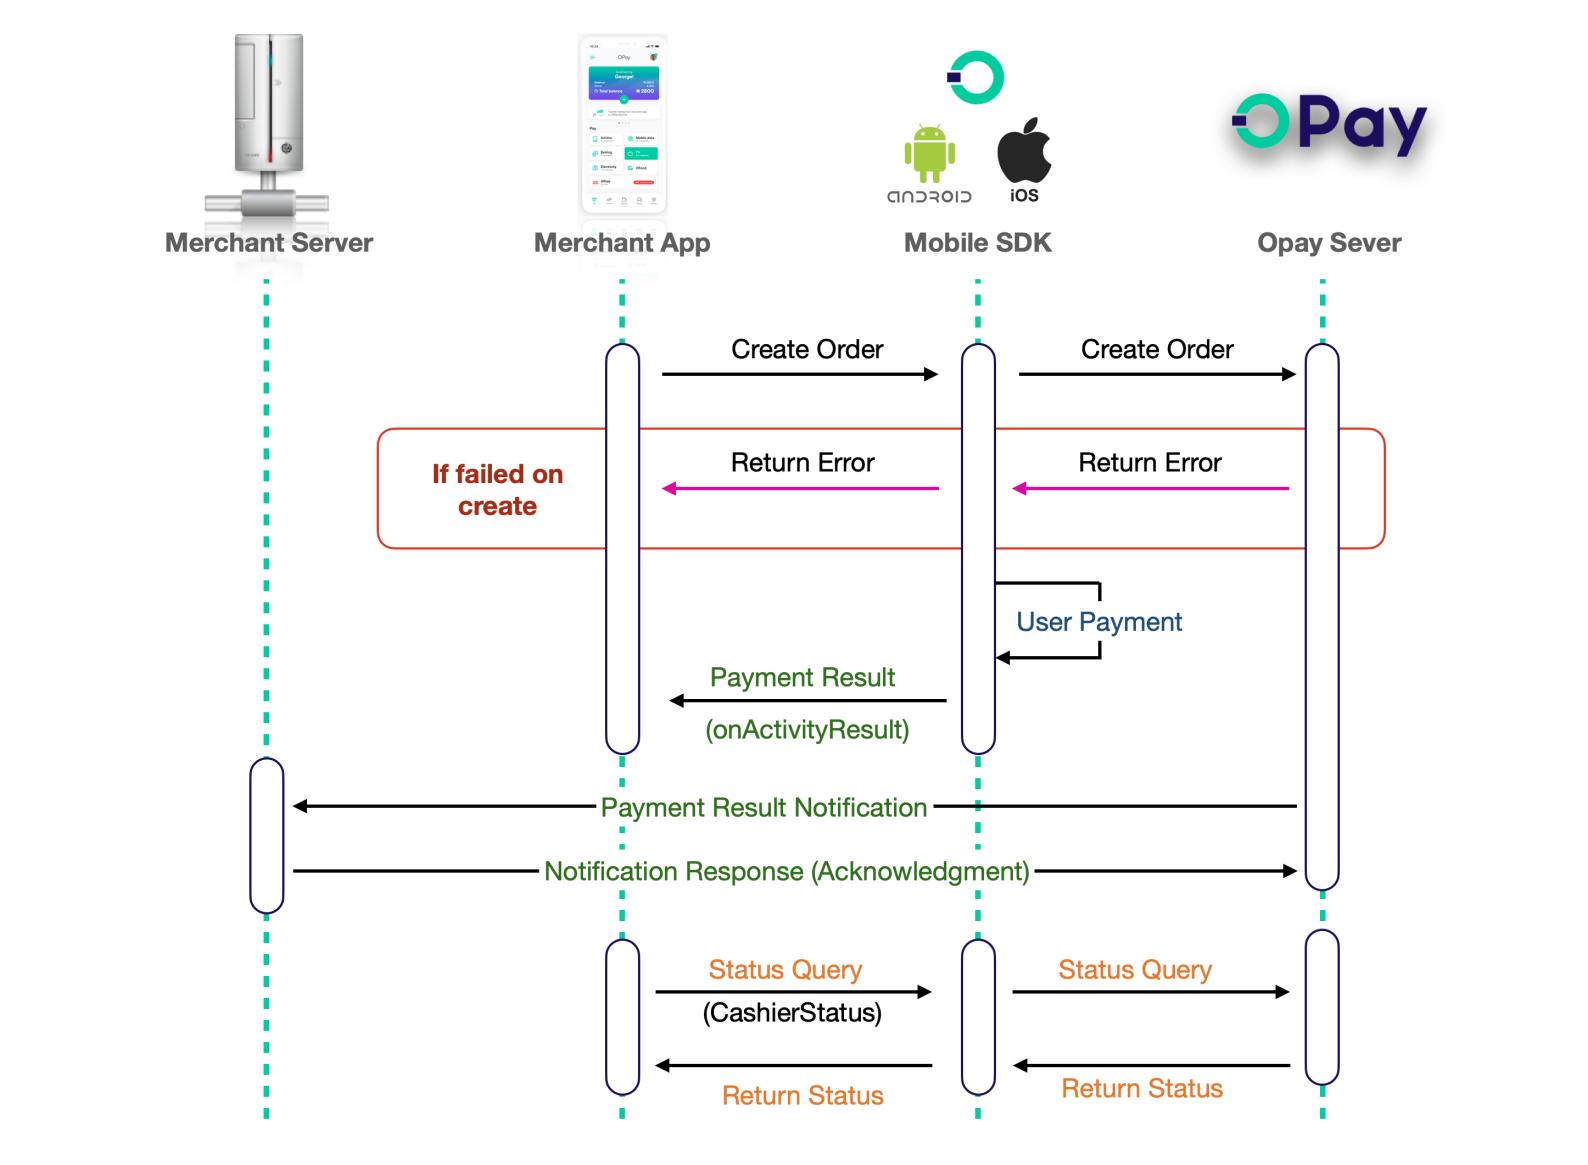
On this page we will walk you through Flutter SDK integration steps:
- Initialize and configure
FlutterSDK. - Present Payment options and collect you client's payment data.
- OPay
FlutterSDK plugin will send payment request to OPay. - Return payment processing information to our
FlutterSDK plugin. - Within your
Flutterapplication, inform your client with the payment result.
SDK Integration
Please follow the below steps in order to get the SDK integrated and ready for use within your application logic.
-
Add dependencies to your package's pubspec.yaml.
dependencies: opay_online_flutter_sdk: "<1.0.0" -
Run this command with Flutter:
$ flutter pub get -
Import it. Now in your Dart code, you can use:
import 'package:opay_online_flutter_sdk/opay_online_flutter_sdk.dart';
SDK API Hooks
After integrating OPay SDK, now it's time to know how to use our SDK API hooks to:
- Toggle between Sandbox (testing) and Production environment.
- Create payment order.
- Handling payment result.
- Order status query.
Setup SDK Environment
During the development and integration phase, you may use our SDK in testing mode be setting setting setSandBox(true):
OPayTask.setSandBox(true);
Once you are done with your testing and your application is now ready for production, you can setEnv(false):
OPayTask.setSandBox(false);
Create Payment Order
Your app cart item should implement PayParams object, the below table
illustrates the values that should be passed through your PayParams object.
| Parameter | type | Required | Description | |
|---|---|---|---|---|
| publicKey | String |
required | Your OPay merchant account public key. | |
| merchantId | String |
required | Your OPay account merchant ID. | |
| merchantName | String |
required | Merchant Name to be displayed in cashier checkout form. | |
| reference | String |
required | Payment reference number in your system. | |
| countryCode | String |
required | Country code (NG). | |
| currency | String |
required | Currency type (NGN). | |
| payAmount | Long |
required | payment total amount. | |
| productName | String |
required | Name of Product/Service to be purchased. | |
| productDescription | String |
required | Description of Product/Service to be purchased. | |
| callbackUrl | String |
optional | If you have sent callbackUrl through API, OPay will send callback notification to this callbackUrl. If you didn't send callbackUrl through API, you need to configure webhook url on the merchant dashboard, and OPay will send callback notification to this webhook url. See callback here | |
| expireAt | Integer |
required | Payment expiration time in minutes. | |
| payMethod | String |
optional | The preferred payment method to be presented to your customer. See available options here. If not set, all supported payment methods will be available to your customer to choose from. | |
| userInfo JSON Object |
||||
| userId | String |
optional | the customer user id | |
| userName | String |
optional | the customer user name | |
| userMobile | String |
optional | the customer user mobile | |
| userEmail | String |
optional | the customer user email | |
Create PayInput PayParams object is given below.
                    var payInput = PayParams(
                        publicKey : "{PublicKey}",// your public key
                        merchantId : "256612345678901",// your merchant id
                        merchantName : "TEST 123",
                        reference : "12347544444555666",// reference unique, must be updated on each request
                        countryCode : "NG", // uppercase
                        currency : "NGN", // uppercase
                        payAmount : 10000,
                        productName : "",
                        productDescription :"",
                        callbackUrl :"http://www.callbackurl.com",
                        userClientIP :"110.246.160.183",
                        expireAt :30,
                        paymentType :"", // optional
                        //optional
                        userInfo = UserInfo( "userId","userEmail","userMobile","uesrName" )
                    )
After initiating the required PayParams data, you need to call OPayTask.createOrder to start creating an order. Code example as follows:
                        EasyLoading.show(status: "loading");
                        OPayTask().createOrder(context,payParams,httpFinishedMethod:(){
                        }).then((response){
                            //httpResponse (Just check the reason for the failure of the network request)
                            String createOrderResult=response.payHttpResponse.toJson((value){
                                if(value!=null){
                                    return value.toJson();
                                }
                                return null;
                            }).toString();
                            debugPrint("httpResult=$createOrderResult");
                            // h5 Response (Payment result check )
                            if(response.webJsResponse!=null){
                                var status = response.webJsResponse?.orderStatus;
                                debugPrint("webJsResponse.status=$status");
                                if(status!=null){
                                    EasyLoading.showToast(status,duration: const Duration(seconds:5));
                                }
                                switch(status){
                                    case PayResultStatus.initial:
                                        break;
                                    case PayResultStatus.pending:
                                        break;
                                    case PayResultStatus.success:
                                        break;
                                    case PayResultStatus.fail:
                                        break;
                                    case PayResultStatus.close:
                                        break;
                                }
                            }
                        });
Handling Payment Result
Once the payment has been completed by your client, OPay server will respond back to the SDK to let you know the payment processing result. After your client completes the payment, you will get the payment processing result in the form of Json object. :
Sample response Json object.
                        {
                            "callbackName": "clickReferenceCodeReturnBtn",
                            "eventName": "clickReferenceCodeReturnBtn",
                            "merchantId": "256612345678901",
                            "orderNo": "211026140930379662",
                            "orderStatus": "PENDING", // INITIAL - SUCCESS - FAIL - CLOSE
                            "payNo": "211026140930379662",
                            "referenceCode": "607943772"
                        }
Due to network and any other issues, the order status may not be timely. It is highly recommended to call order status inquiry to ensure the accuracy.
Order Query Status
Due to network and any other issues, the order status may not be timely. It is highly recommended
to call order status inquiry to ensure the integrity of your data. To that end,
You will need to create a CashierStatusParams object that contains the following request parameters:
| Parameter | type | Required | Description |
|---|---|---|---|
| publicKey | String |
required | Your OPay merchant account public key. |
| merchantId | String |
required | Your OPay account merchant ID. |
| reference | String |
required | Payment reference number in your system. |
| countryCode | String |
required | Country code (NG). |
                        CashierStatusParam statusParam = CashierStatusParam(
                            privateKey:"OPAYPRV16204416967420.5265578503143995",
                            merchantId: "256621050820270",
                            reference:"126",
                            countryCode:Country.NIGERIA.countryCode
                        );
After creating the CashierStatusParams object, you need to call the OPayTask().getCashierStatus(params) method to
query order status and process the subsequent logic according to the response object returned.
                        EasyLoading.show(status: "loading");
                        OPayTask().getCashierStatus(statusParam).then((response){
                            EasyLoading.dismiss();
                            OrderInfo? data = response.payHttpResponse.data;//get result data
                            switch(data?.status){
                              case PayResultStatus.initial:
                                break;
                              case PayResultStatus.pending:
                                break;
                              case PayResultStatus.success:
                                break;
                              case PayResultStatus.fail:
                                break;
                              case PayResultStatus.close:
                                break;
                            }
                            setState(() {
                              _getCashierStatusResult=response.payHttpResponse.toJson((value){
                                if(value!=null){
                                  return value.toJson();
                                }
                              }).toString();
                            });
                        });
Response data format is as follows:
                        {
                            "code": "00000",
                            "message": "SUCCESSFUL",
                            "data":{
                                "reference":"1001000",
                                "orderNo":"10212100000034000",
                                "status":"SUCCESS",
                                "vat":{
                                    "total":10000,
                                    "currency":"NGN",
                                    "rate":100,
                                    "currencySymbo":"₦"
                                },
                                "failureReason":null,
                                "silence":"Y"
                            }
                        }


