OPay iOS SDK
All payment solutions offered by OPay readily available in your clients' hands.
Prerequisites
OPay SDK will allow your iOS application to:
- Launch full-screen activities to collect payment details, shipping address, and shipping method.
- Accept card, reference code, installment payment readily available from OPay.
Make sure you have an active OPay merchant account, or create account.
To avoid any conflicts and have a seamless integration, make sure you have the following compatibility list satisfied.
How iOS SDK Plugin Looks Like
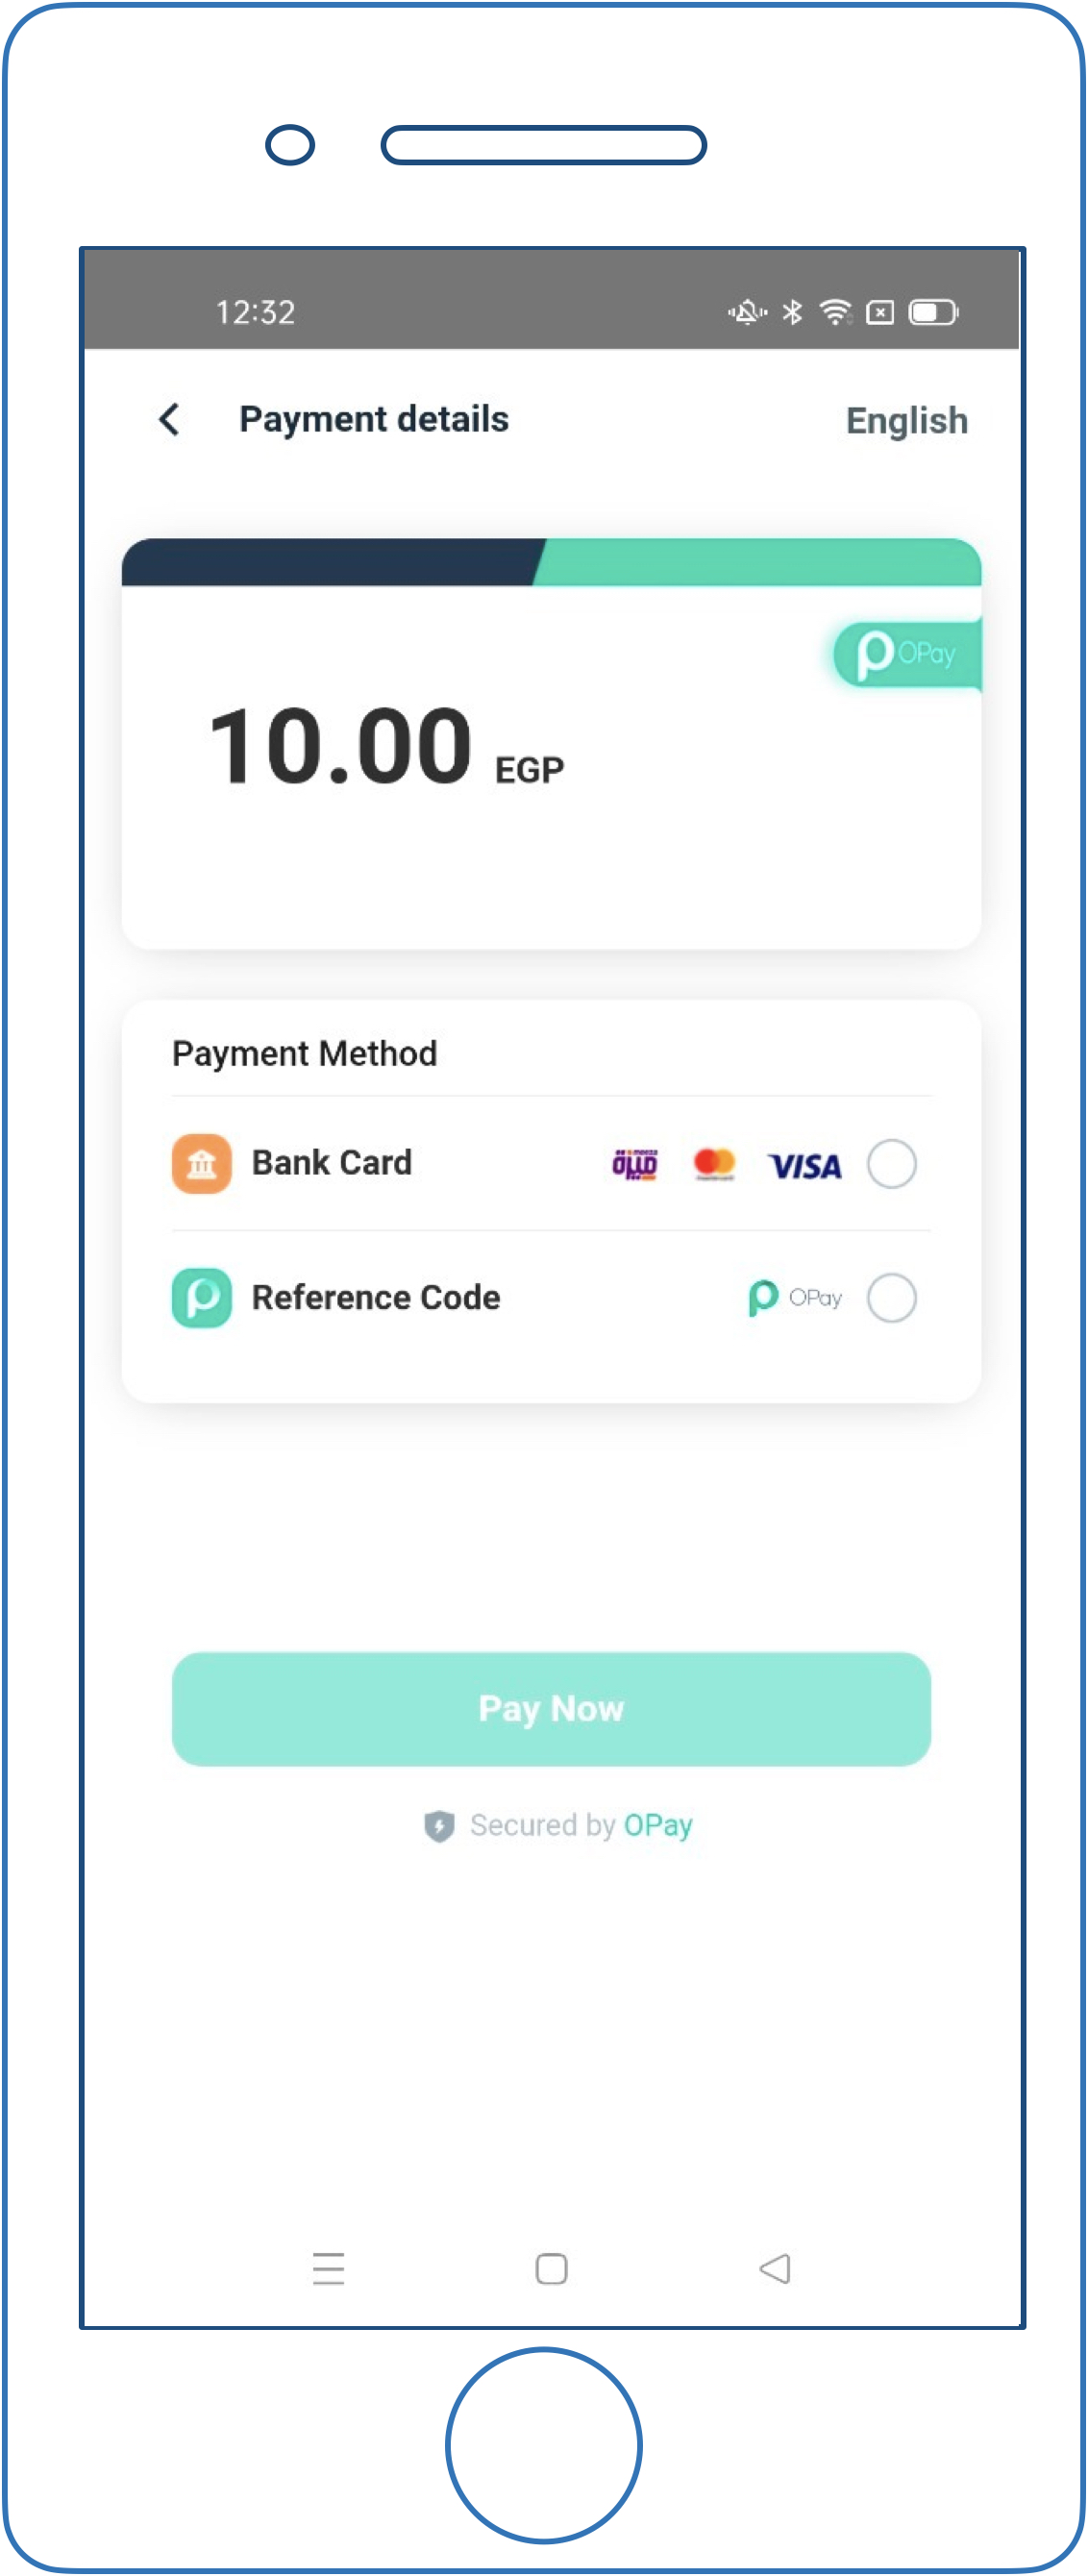
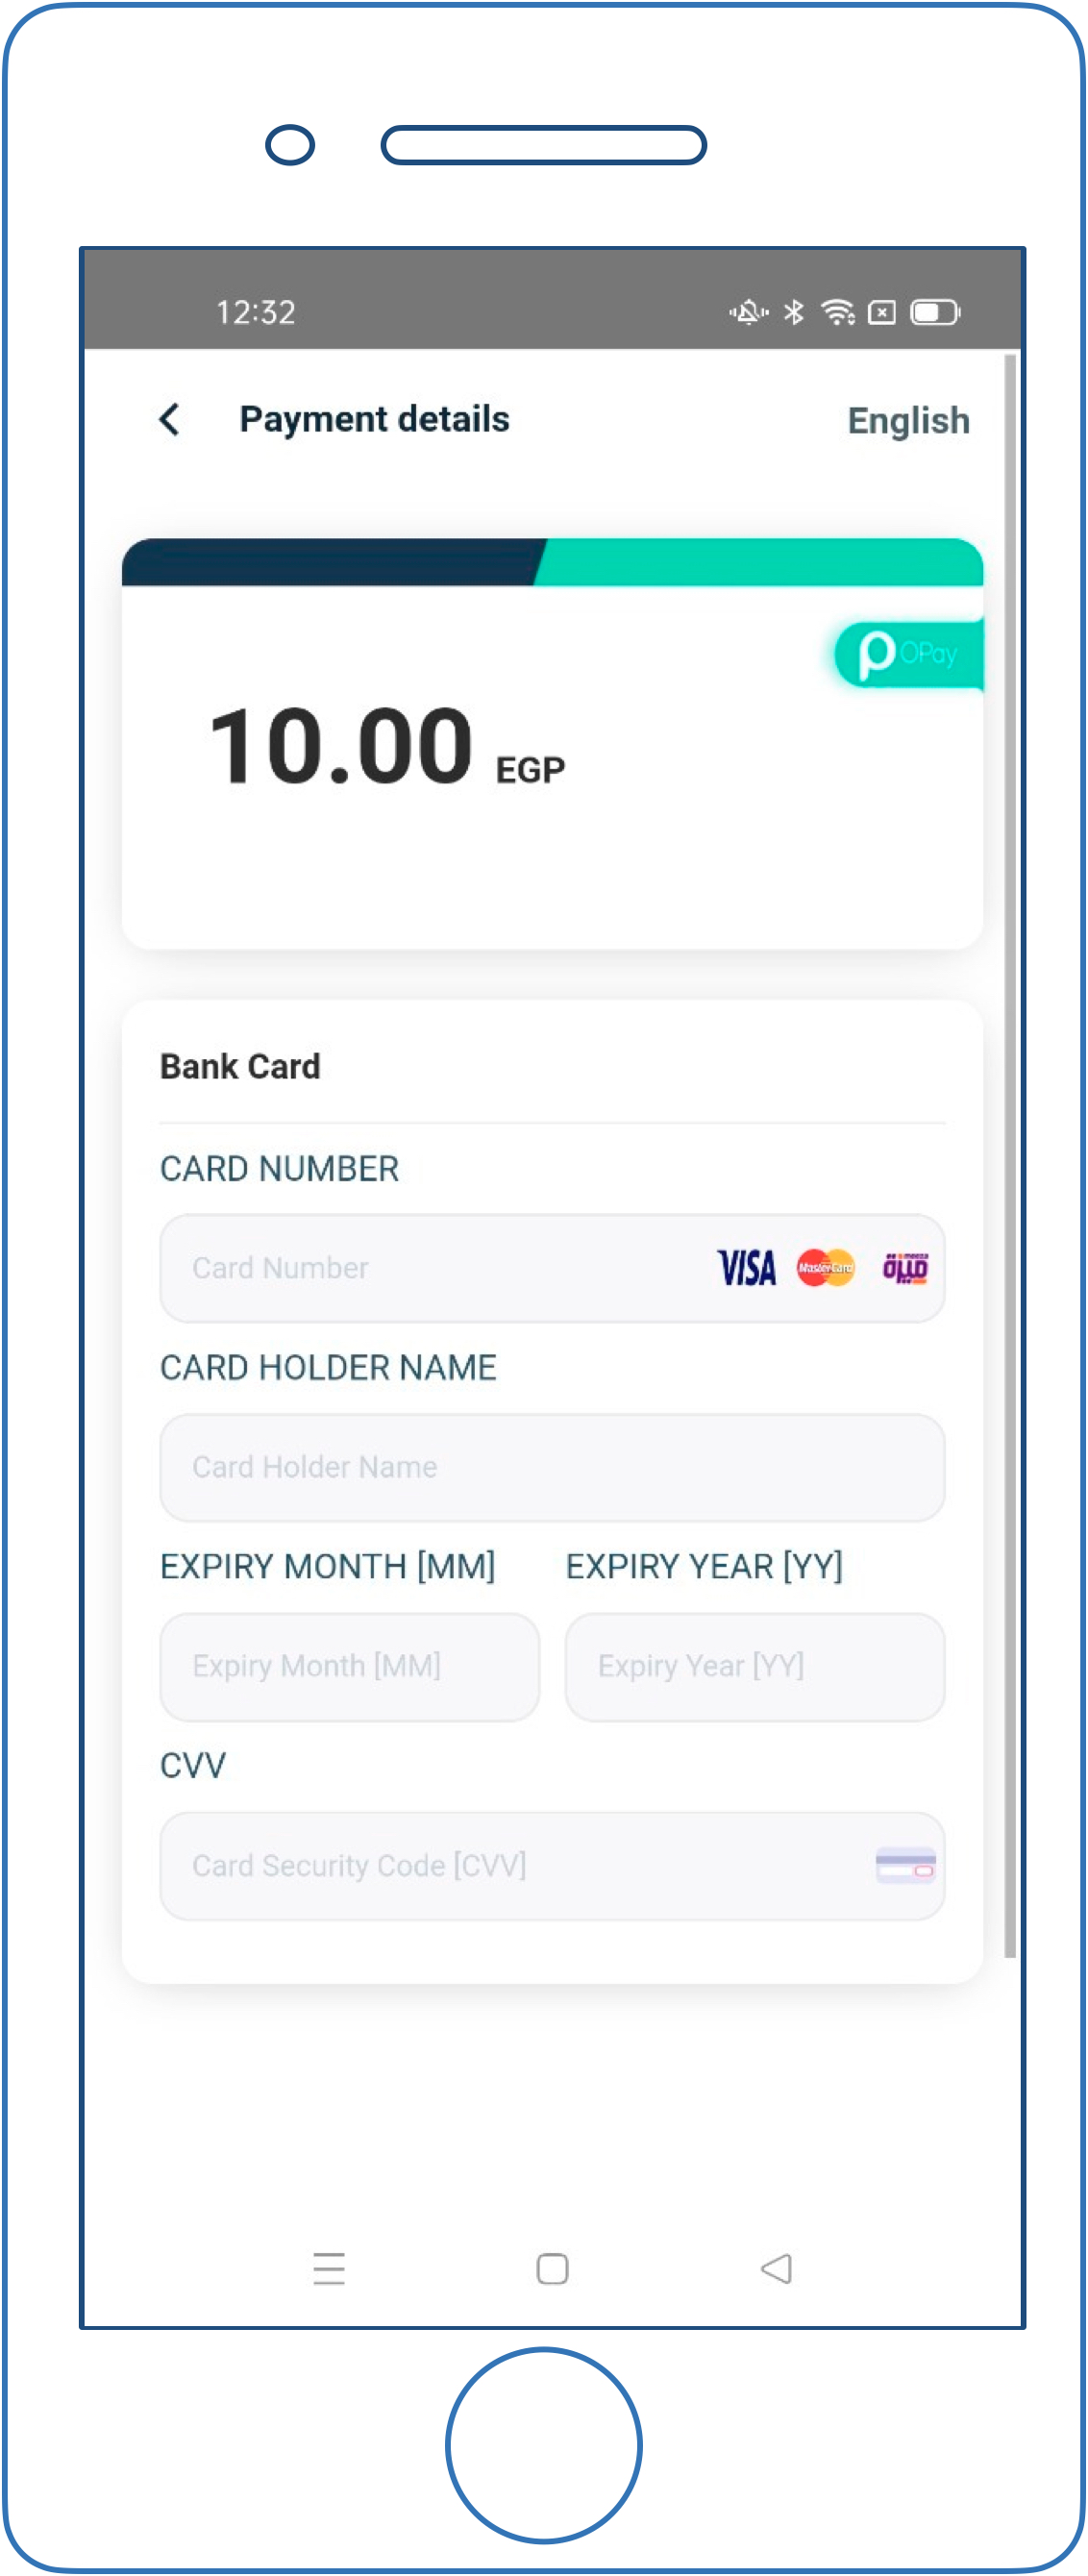
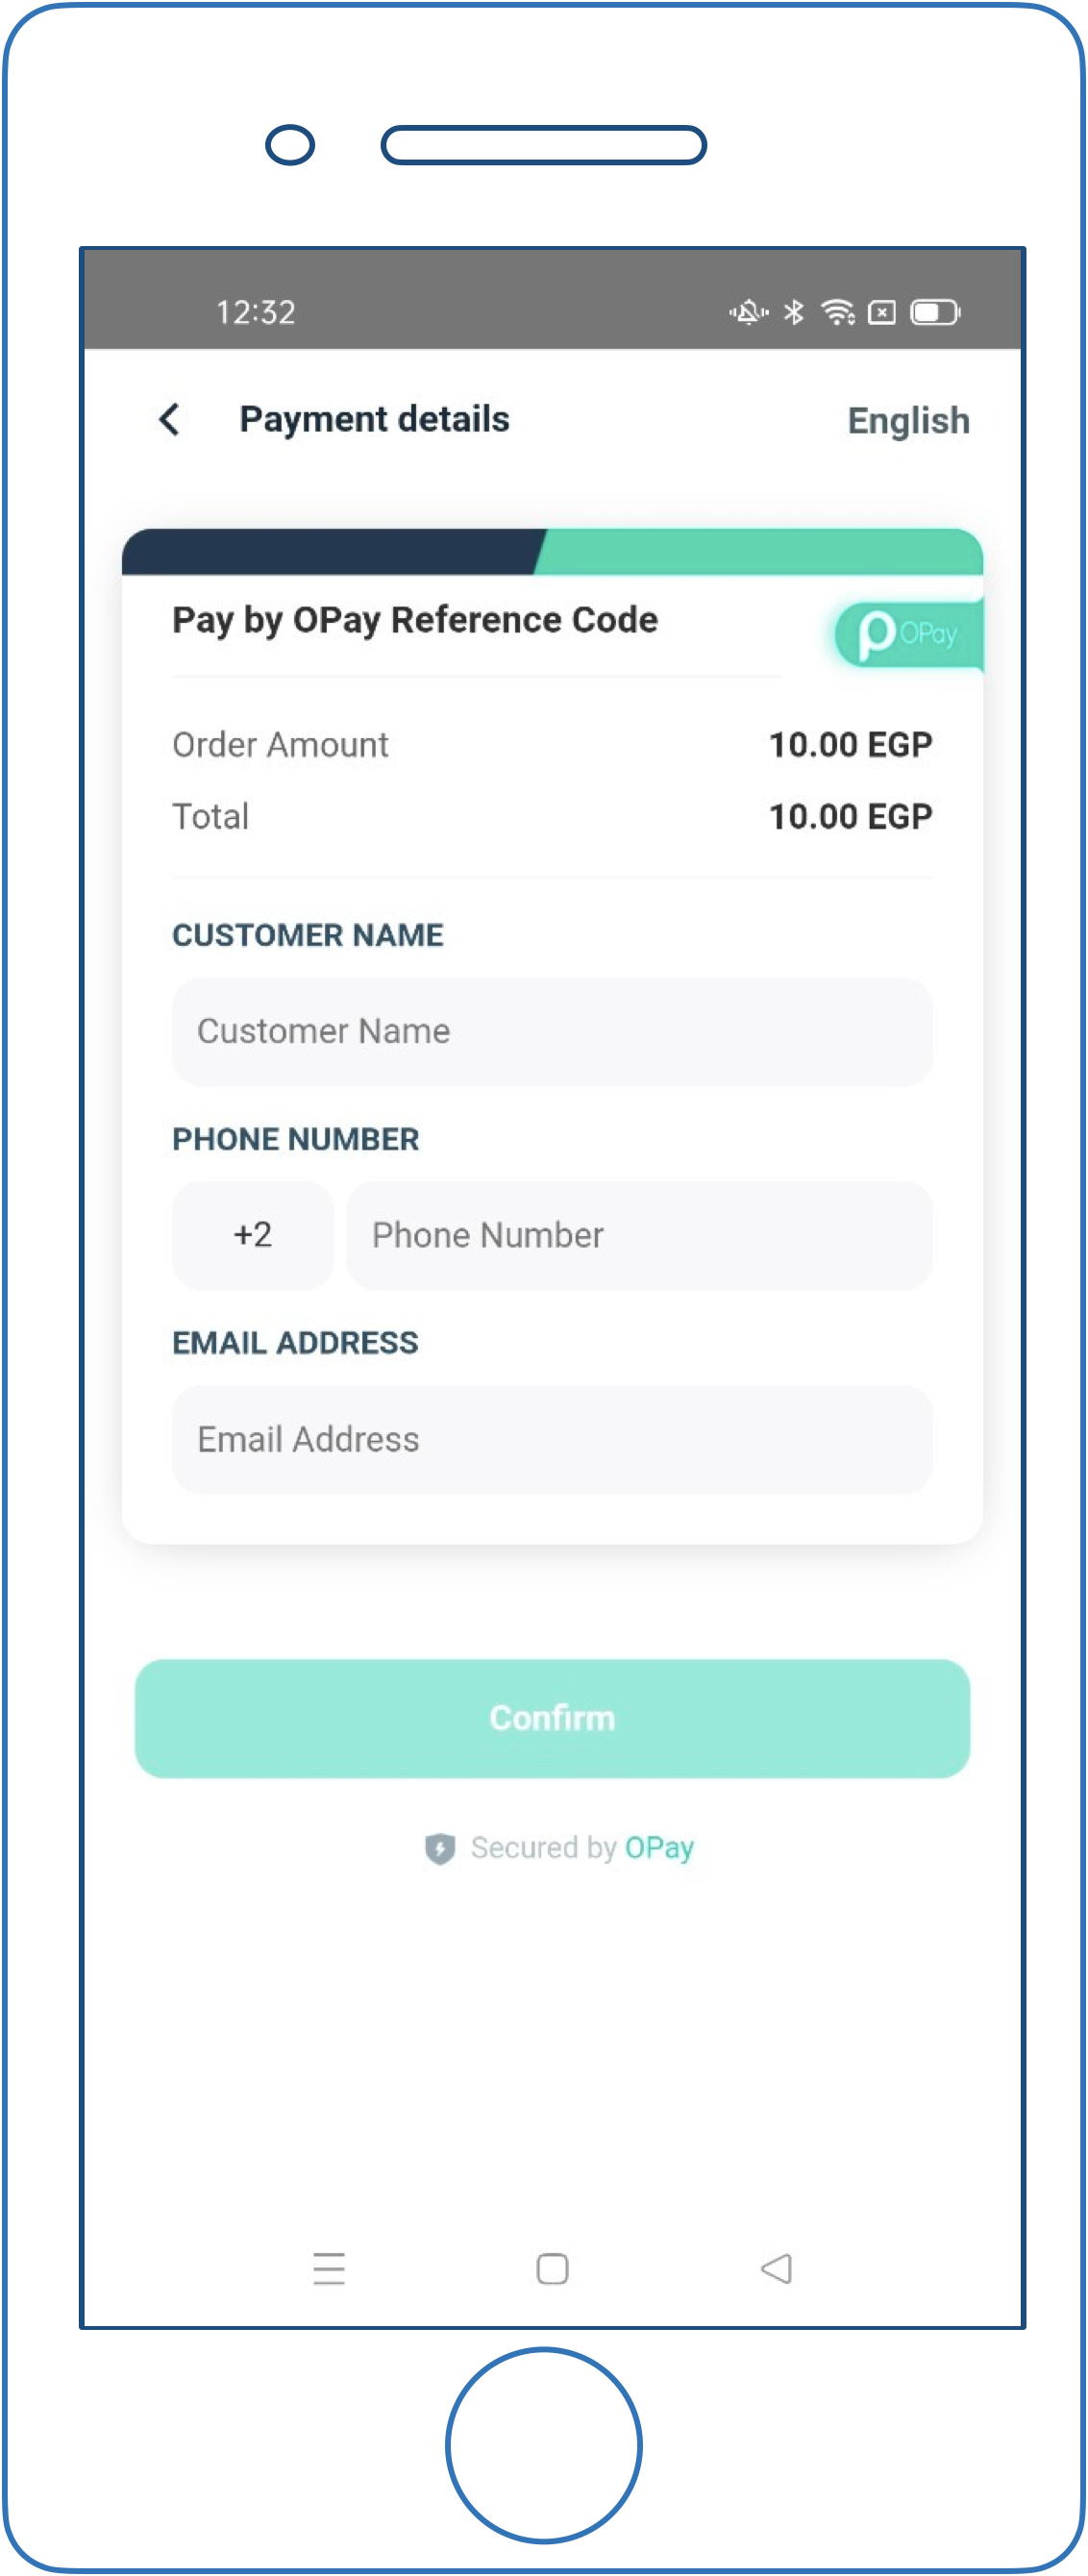
and test OPay demonstrative application.
How it works
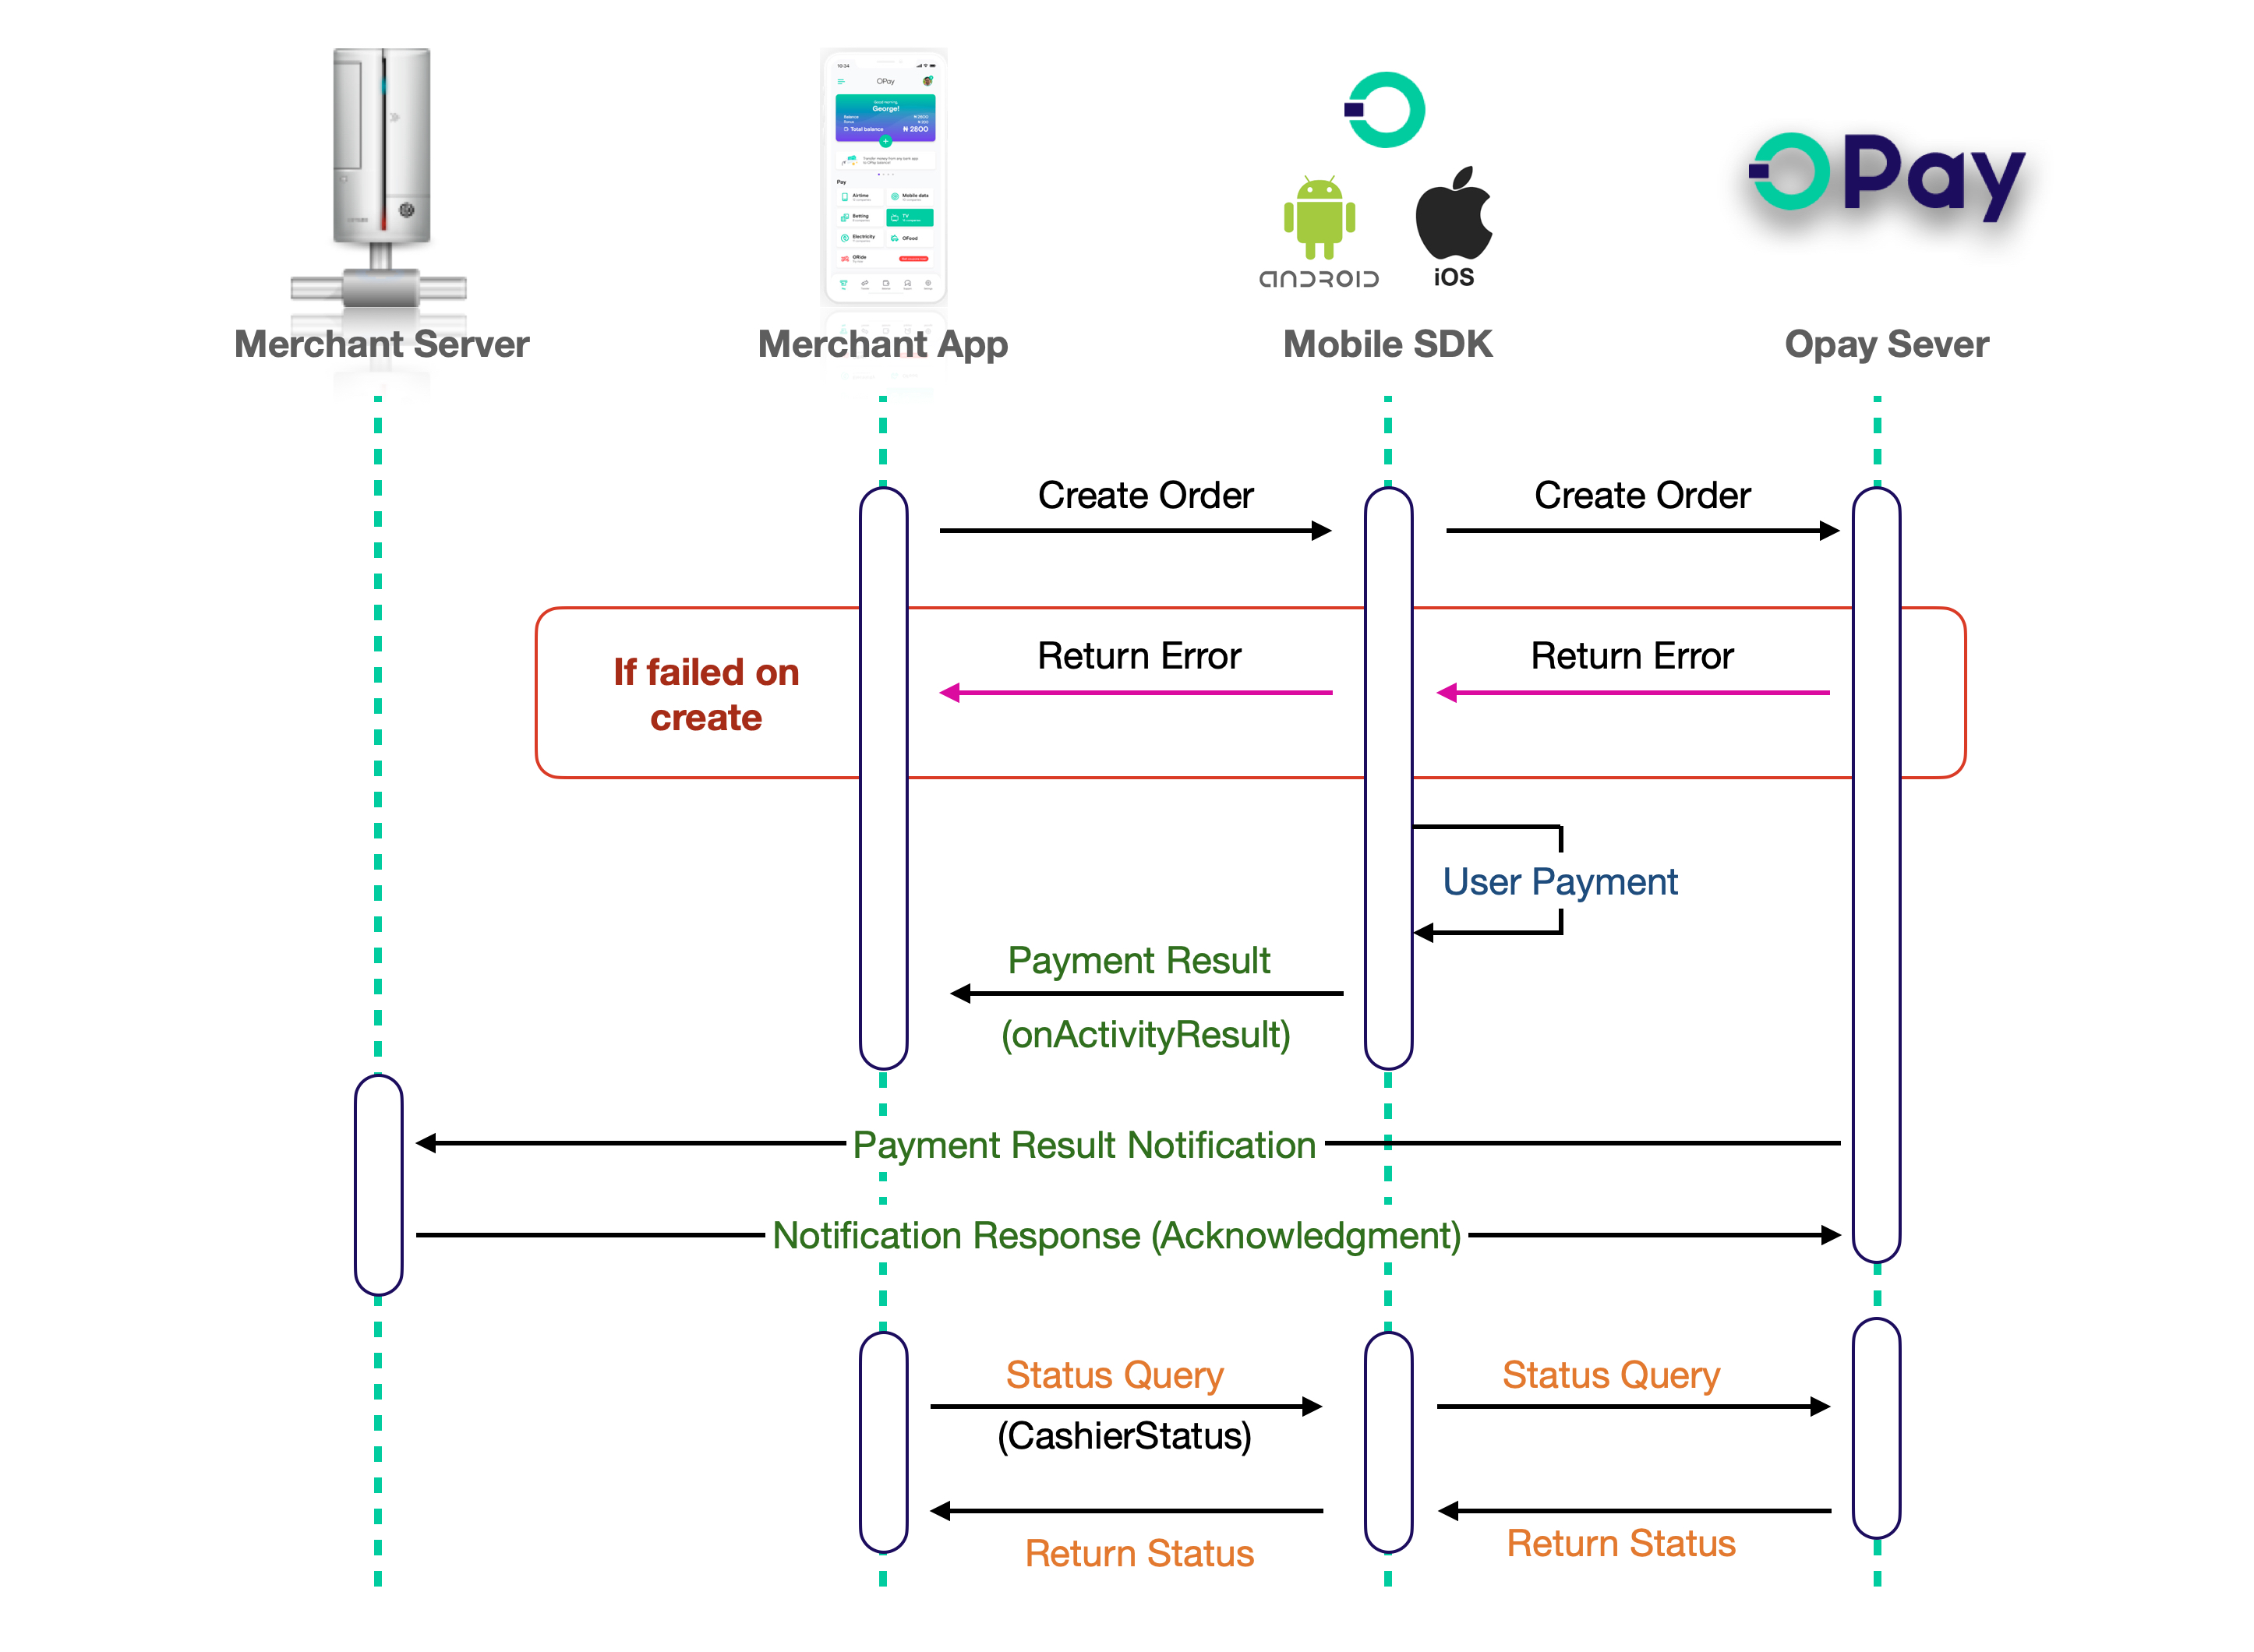
On this page we will walk you through iOS SDK integration steps:
- Initialize and configure
iOSSDK. - Present payment options and collect you client's payment data.
- OPay
iOSSDK plugin will send payment request to OPay. - Return payment processing information to our
iOSSDK plugin. - Within your
iOSapplication, inform your client with the payment result.
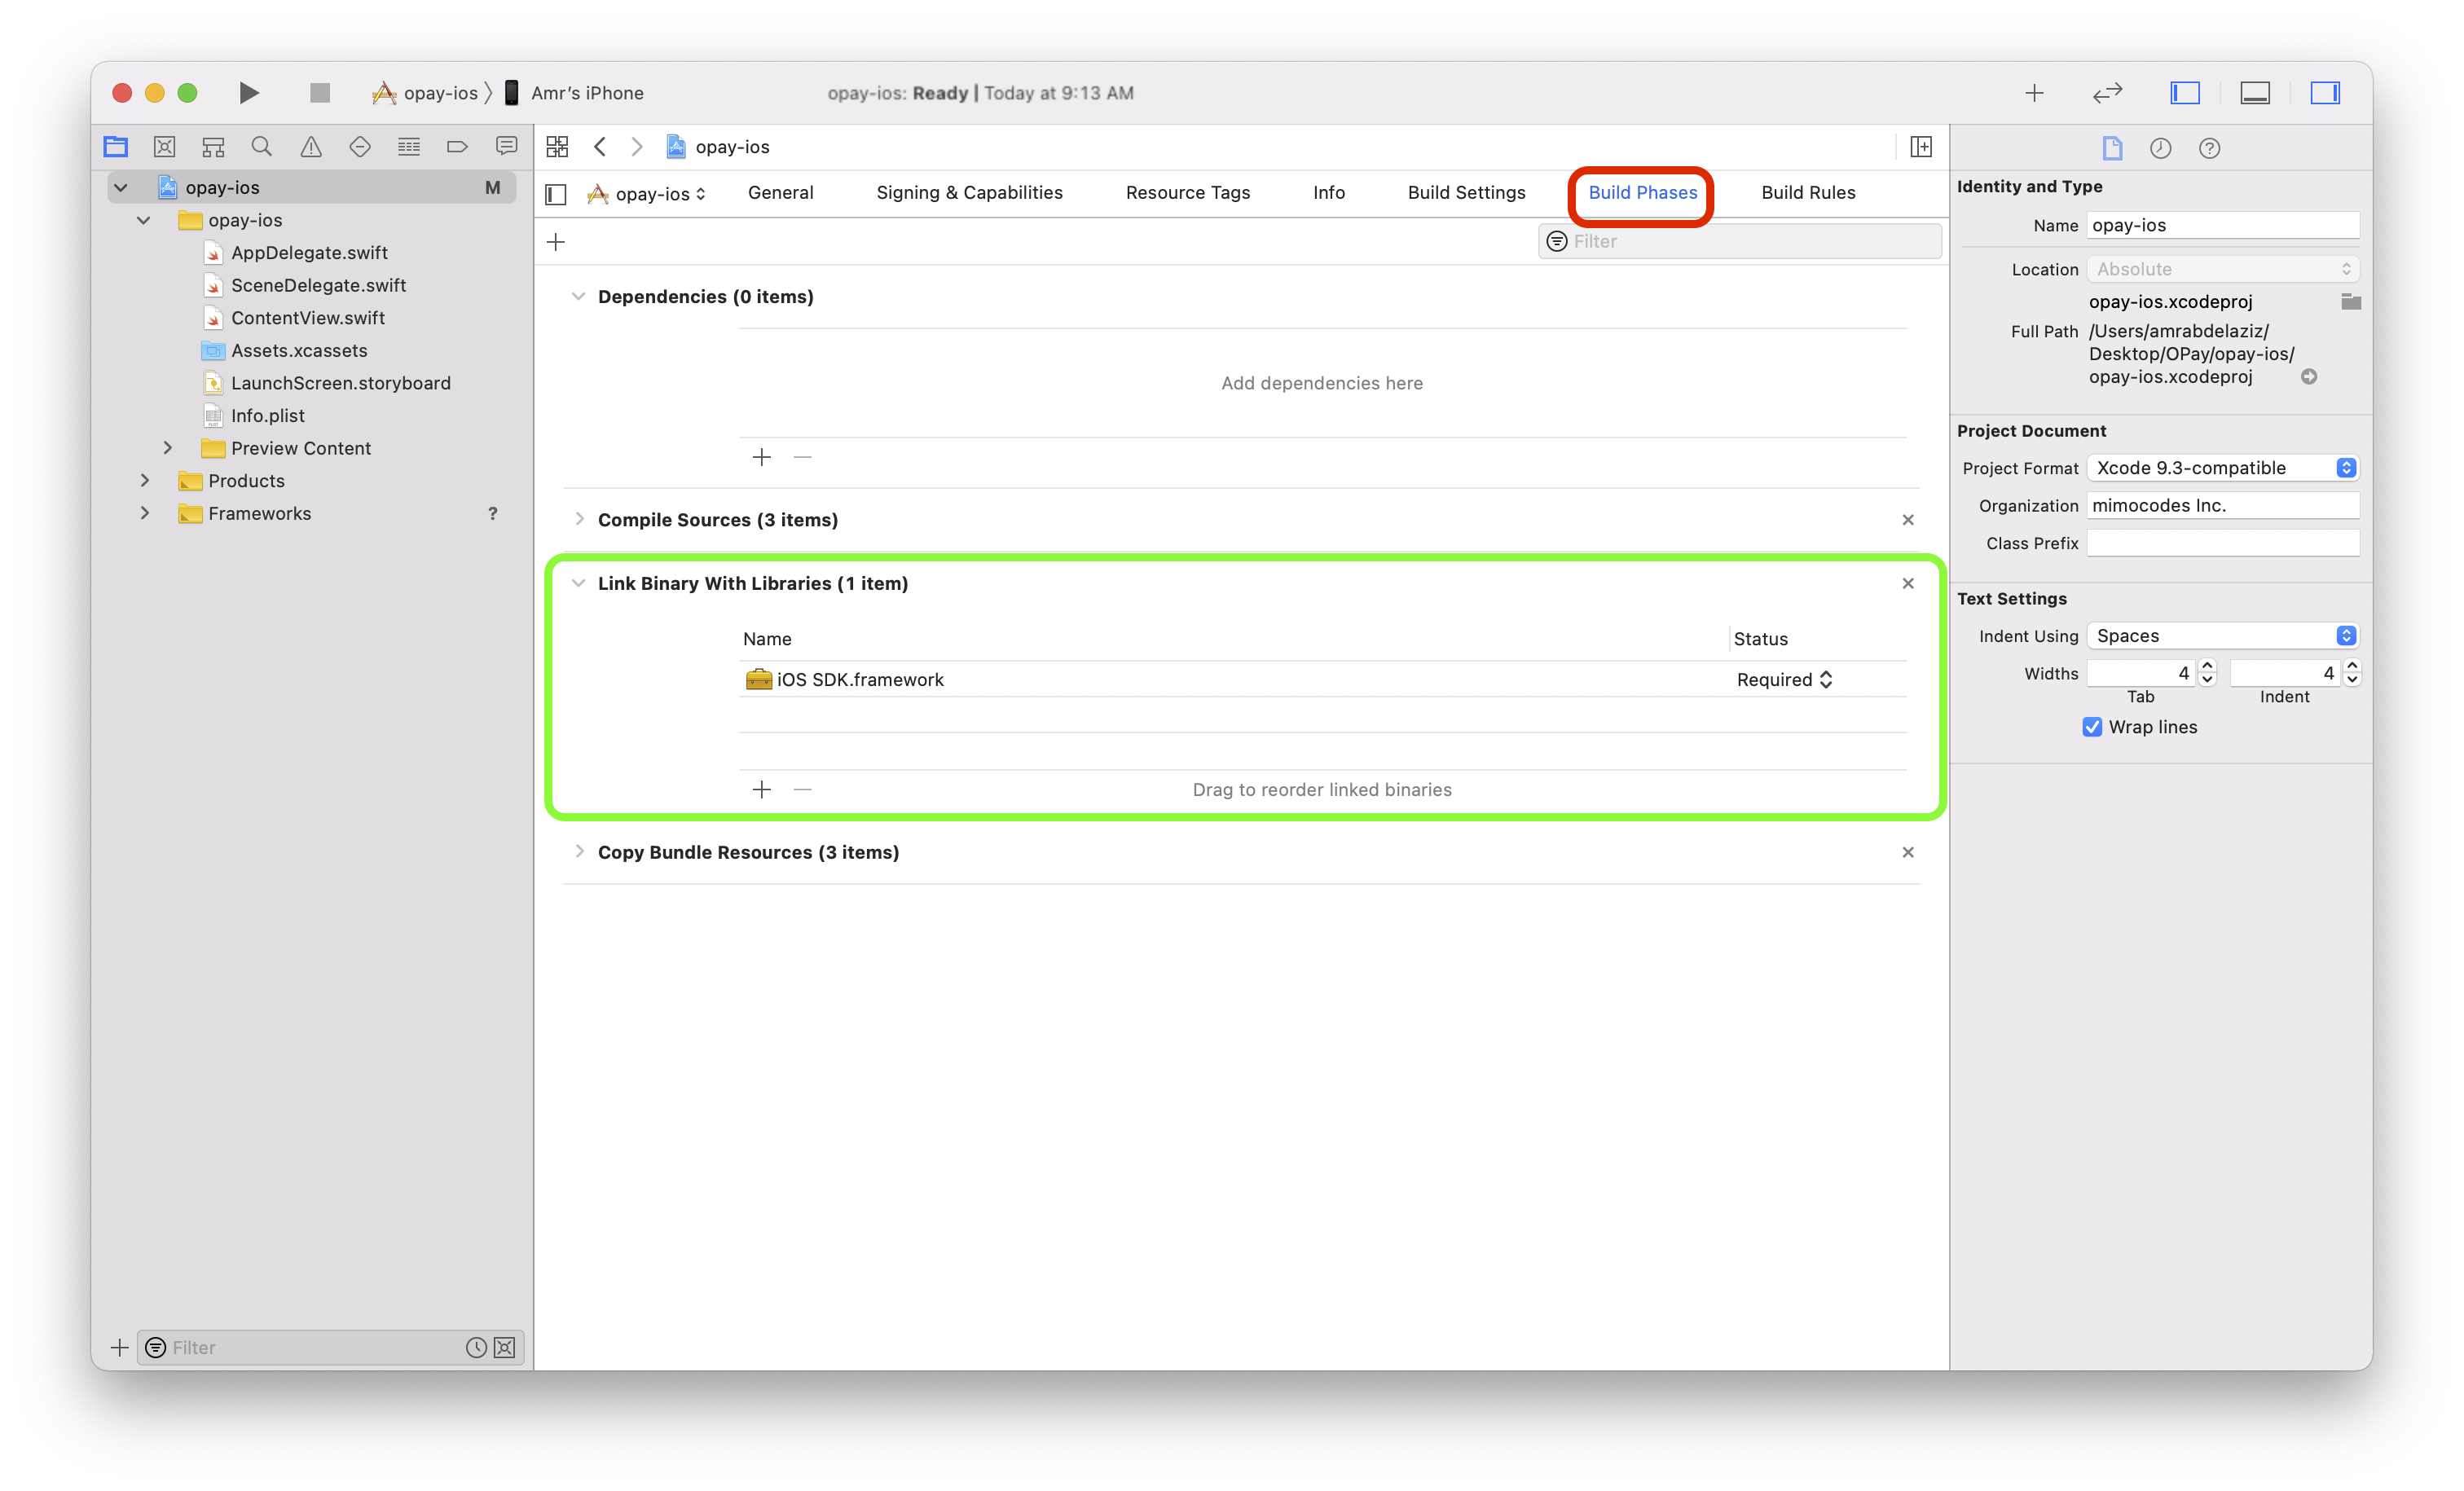
SDK Integration
Please follow the below steps in order to get the SDK integrated and ready for use within your application logic:
SDK API hooks
After integrating OPay SDK, now it's time to know how to use our SDK API hooks to:
Create Payment Order
Your app cart item should implement dictionary data, the below table
illustrates the values that should be passed through your dictionary object.
| Parameter | type | Required | Description | |
|---|---|---|---|---|
| publickey | String |
required | Your OPay merchant account public key. | |
| merchantId | String |
required | Your OPay account merchant ID. | |
| merchantName | String |
required | Merchant Name to be displayed in cashier checkout form. | |
| reference | String |
required | Payment reference number in your system. | |
| countryCode | String |
required | Country code (NG). | |
| currency | String |
required | Currency type (NGN). | |
| payAmount | Long |
required | payment total amount. | |
| productName | String |
required | Name of Product/Service to be purchased. | |
| productDescription | String |
required | Description of Product/Service to be purchased. | |
| callbackUrl | String |
optional | If you have sent callbackUrl through API, OPay will send callback notification to this callbackUrl. If you didn't send callbackUrl through API, you need to configure webhook url on the merchant dashboard, and OPay will send callback notification to this webhook url. See callback here | |
| expireAt | Integer |
required | Payment expiration time in minutes. | |
| payMethod | String |
optional | The preferred payment method to be presented to your customer. See available options here. If not set, all supported payment methods will be available to your customer to choose from. | |
| userInfo JSON Object |
||||
| userId | String |
optional | the customer user id | |
| userName | String |
optional | the customer user name | |
| userMobile | String |
optional | the customer user mobile | |
| userEmail | String |
optional | the customer user email | |
Create dictionary data as below.
                    NSDictionary *dic=@{
                        @"merchantName": merchantName,
                        @"country": country,
                        @"reference": reference,
                        @"amount": @{
                            @"total": payAmount,
                            @"currency": currency
                        },
                        @"product": @{
                            @"name": productName,
                            @"description": productDescription
                        },
                        @"callbackUrl": callbackUrl,
                        @"userClientIP":userClientIP,
                        @"expireAt":@([expireAt integerValue])
                        @"userInfo": @{
                            @"userId":userId,
                            @"userName":userName,
                            @"userMobile":userMobile,
                            @"userEmail":userEmail
                        }
                    };
Now, you need to initialize the management class. Code example as follows:
[[[OpayOrderRequestManager instance]registerApp:publickey MerchantId:merchantId isDebug:_isDebug]
OpayOrderRequestManager.instance().registerApp(publicKey, merchantId: merchantId, isDebug: isDebug)
Publickey is the applied public key, merchantId is the assigned merchant ID
isDebug: set to yes to switch to the sandbox environment. Set to No to switch to the production environment
Once you have initialized the management class, you need to call the
OpayOrderRequestManager management class to start creating an order.
You may follow the following sample code.
                                    [[OpayOrderRequestManager instance] sendOrder:dic successHandler:^(id  _Nonnull result) {
                                        //Success callback
                                    } errorHandler:^(NSString * _Nonnull code, NSString * _Nonnull msg) {
                                        //error message callback
                                    } failHandler:^{
                                        //failed callback
                                    }];
                                    OpayOrderRequestManager.instance().sendOrder(dic, successHandler: { (result) in
                                        //success callback
                                    }, errorHandler: { (code, msg) in
                                        //error callback
                                    }) {
                                        //failed callback
                                    }
failHandler: Handle the logic for the callback after the service fails to be called.
successHandler: For the callback after the service is called successfully,
the callback parameter result is the result returned by the calling service.
The type is a dictionary and contains order information. Sample response
is given below:
                        {
                            "code": "00000",
                            "data": {
                                "amount": {
                                    "currency": "NGN",
                                    "total": 1000
                                },
                                "cashierUrl": "https://sandboxcashier.opaycheckout.com/checkout-list?orderNo=211026140930379662&merchantId=256612345678901&country=NG&rc=false",
                                "orderNo": "211026140930379662",
                                "reference": "12347544444555666llljhh",
                                "status": "INITIAL",
                                "vat": {
                                    "currency": "NGN",
                                    "total": 0
                                }
                            },
                            "message": "SUCCESSFUL"
                        }
Depending on the status code of the response, you should build some logic to handle any errors that a request or the system may return. A list of possible potential error codes that you may receive can be found below.
| Error Code | Error Message |
|---|---|
| 02000 | Authentication failed. |
| 02001 | The request parameters are invalid. |
| 02002 | The merchant has not configured this feature. |
| 02003 | Payment method not support. |
| 02004 | Order already exists. |
| 02007 | Merchant unavailable. |
| 50003 | The service is unavailable, please try again. |
Handling Payment Result
Once the payment has been completed by your client, OPay server will respond back to the SDK to let you know the payment processing result. After your client completes the payment, you will get the payment processing result in the form of Json object :
Sample response Json object.
                        {
                            "callbackName": "clickReferenceCodeReturnBtn",
                            "eventName": "clickReferenceCodeReturnBtn",
                            "merchantId": "256612345678901",
                            "orderNo": "211026140930379662",
                            "orderStatus": "PENDING", // INITIAL - SUCCESS - FAIL - CLOSE
                            "payNo": "211026140930379662",
                            "referenceCode": "607943772"
                        }
Due to network and any other issues, the order status may not be timely. It is highly recommended to call order status inquiry to ensure the accuracy.
Order Query Status
Due to network and any other issues, the order status may not be timely. It is highly recommended
to call order status inquiry to ensure the integrity of your data. To that end,
You will need to create a dictionary that contains the following request parameters:
| Parameter | type | Required | Description |
|---|---|---|---|
| privateKey | String |
required | Your OPay merchant account public key. |
| merchantId | String |
required | Your OPay account merchant ID. |
| reference | String |
required (if no orderNo provide) | Payment reference number in your system. |
| orderNo | String |
required (if no reference provide) | Order id. |
| countryCode | String |
required | Country code (NG). |
You can only pass one of the reference and orderNo keys.
                        NSDictionary *dic=@{
                            @"country": countryCode,
                            @"reference": reference,
                            @"orderNo":orderNo
                        };
After creating the query dictionary, you need to initialize the managemnt
class as follows:
[[[OpayOrderRequestManager instance]registerApp: privateKey MerchantId:merchantId isDebug:_isDebug]
OpayOrderRequestManager.instance().registerApp(privateKey, merchantId: merchantId, isDebug: isDebug)
Now, you need to :
                                    [OpayOrderRequestManager instance] queryOrder:dic successHandler:^(NSString * _Nonnull code, NSString * _Nonnull errorMsg, id  _Nonnull result) {

                                    } failHandler:^{

                                    }];
                                    OpayOrderRequestManager.instance().queryOrder(dic, successHandler: { (result) in

                                    }) {

                                    }
failHandler: Handle the logic for the callback after the service fails to be called.
successHandler: For the callback after the service is called successfully,
the callback parameter result is the result returned by the calling service.
The type is a dictionary and contains order status information. Sample response
is given below:
                        {
                            "code": "00000",
                            "message": "SUCCESSFUL",
                            "data":{
                                "reference":"1001000",
                                "orderNo":"10212100000034000",
                                "status":"SUCCESS",
                                "vat":{
                                  "total":10000,
                                  "currency":"NGN",
                                  "rate":100,
                                  "currencySymbo":"₦"
                                },
                                "failureReason":null,
                                "silence":"Y"
                            }
                        }
Depending on the status code of the response, you should build some logic to handle any errors that a request or the system may return. A list of possible potential error codes that you may receive can be found below.
| Error Code | Error Message |
|---|---|
| 02000 | Authentication failed. |
| 02001 | The request parameters are invalid. |
| 02002 | The merchant has not configured this feature. |
| 02006 | Order not found. |
| 02007 | Merchant unavailable. |
| 50003 | The service is unavailable, please try again. |


